
How to create a free website in Blogger (Blogspot) 2020
Why do you need a website?
Which platform is best for creating a free website?
Step 1:Sign in with your Gmail account

Enter your Gmail ID and password. Even if you don’t have an account, you can create one by simply clicking on the signup or create account button. I mentioned my screenshot below; just follow that. Gmail is just a Google product, and it stores your data on servers. That is the reason to have an account.

Step 2: Blog Creation

Next, you will see the interface as in the above images, then click on New blog. (This option shows you if you have already created a site or blog.) Enter your blog title and set the domain as well. The domain works as an address that takes you to your website if you enter your domain in the URL place. You can find a URL box in any browser to navigate your browser and enter it directly.

Step 3: Give your Website title and domain name


Enter your E-mail address to get more interesting updates:
Your best regards, winsomeismail.com
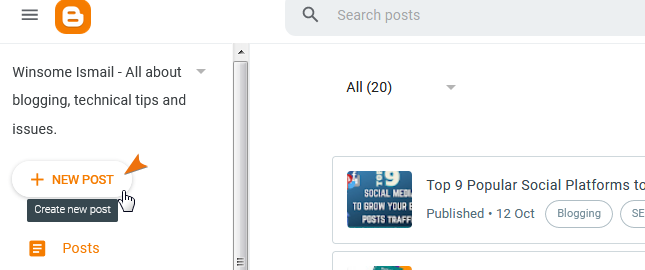
Step 4: Start writing posts
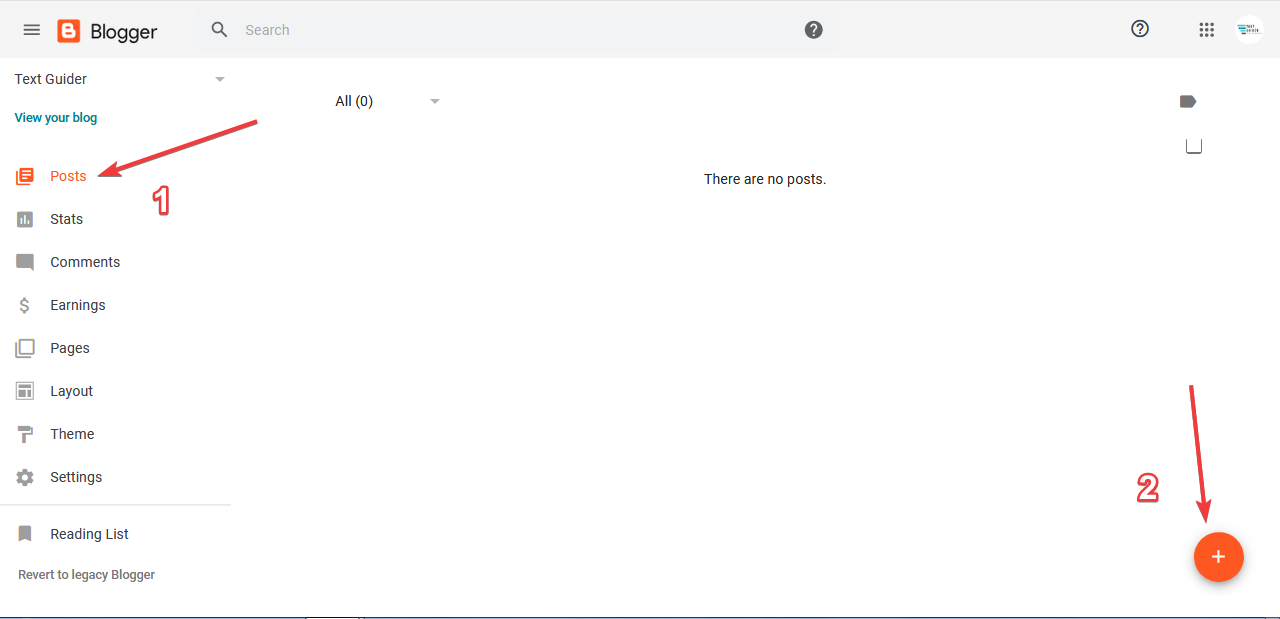
Congratulations! Your page is ready to write posts. Now, you can start to upload content, including videos, images, documents, and many more. After that, just publish your articles. From the above image, simply click on the plus button, and you will see the next page interface as below.
Step 5: Write and Publish your post
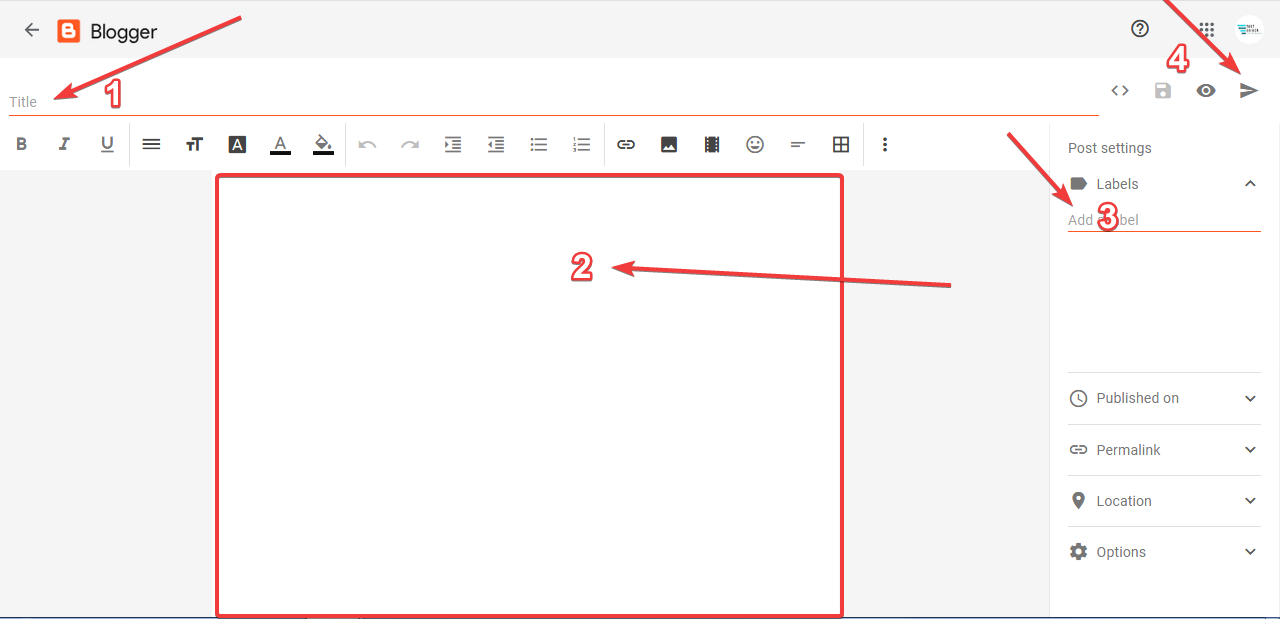
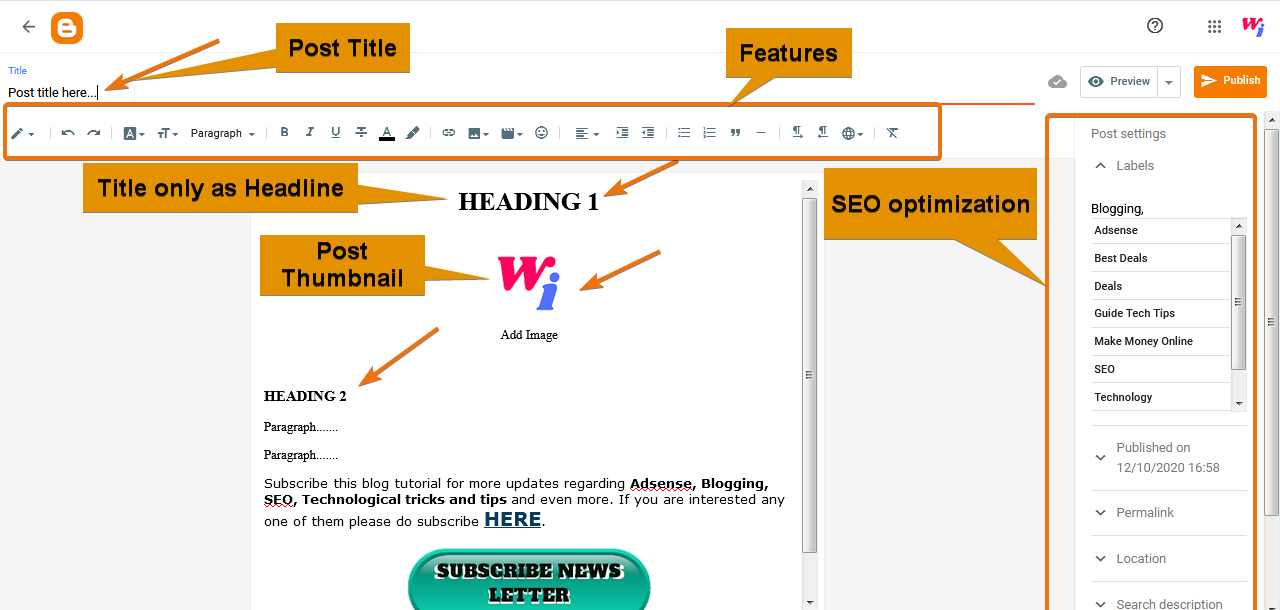
You are supposed to write in this white page content area. Can write personal information details, skills.
Features to write a post
queries Solved
blog url examples,
blogger theme generator,
create a blog website free,
embed blogger into google sites,
google sites vs blogger,
google sites as a blog,
add blogger to google site,
add blogger to google sites,
create a blog with google sites,
create blog on google sites,
how to create a blog with google sites,
how to make a blog in google sites,
how to make a blog with google sites,

Hello! I’m Ismail, founder and author of WinsomeIsmail.com & MyCareerPdf.com websites.
With an MBA and a strong passion for sharing knowledge, I create informative, value-driven content across multiple niches, including Blogging, Finance, SEO, Technology, and Career Development.
“Happiest are those who do the most for others.”
Feel free to explore my articles, and let’s connect!